
If you’re looking for a great way to add an extra challenge to your workout, wall push-ups are the perfect solution for beginners.
This blog post will discuss the benefits of wall push-ups and provide instructions on how to perform them correctly. We’ll also offer tips to help you get the most out of this challenging exercise, plus useful alternatives.
Keep reading below.
Table of Contents
How to Do Wall Push-Ups
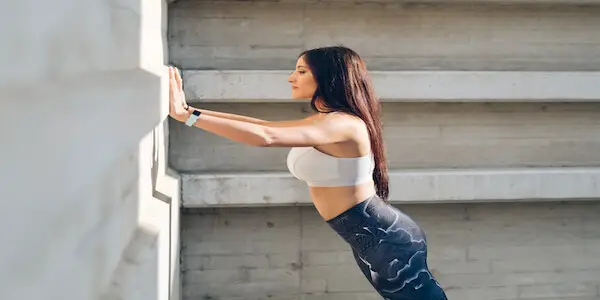
Wall push-ups are a great way to target your chest, triceps, and core without doing a full push-up. They’re also the easier alternative to knee push-ups, which put more force on your upper body’s joints and muscles.
Here’s how to do your wall push-ups correctly.
- Start by standing about an arm’s length away from a wall. The further back you go with your feet, the harder it will be for your muscles.
- Place your palms flat against the wall at shoulder level.
- Bend your elbows and lower your body towards the wall. Keep your back straight and abs engaged.
- Push yourself away from the wall until your arms are extended.
- Repeat 12-15 times.
- Rest and do two more sets.
Benefits and Muscles Worked
Wall push-ups are a great way to build strength in your upper body without putting too much strain on your joints. They’re perfect for beginners who are looking to ease their way into doing regular push-ups. Additionally, wall push-ups can improve your posture and alleviate back pain by strengthening important muscles in your shoulders, upper back, and core.
Muscles worked include:
- Chest: Wall push-ups define and tone your pecs because as you lower your body down, your chest muscles have to work extra hard to keep you stable.
- Triceps: Wall push-ups strengthen and tone the back of your arms because as you push yourself away from the wall, your triceps have to contract to extend your elbows.
- Core: Wall push-ups help engage your core muscles because they must work hard to keep your body stable and in alignment as you move up and down.
- Legs and butt: Wall push-ups also target your lower body muscles, specifically your hamstrings and glutes, because as you lower your body towards the wall, your legs have to bear the brunt of your weight.
TIPS:
- To make wall push-ups more challenging, try moving your feet further away from the wall.
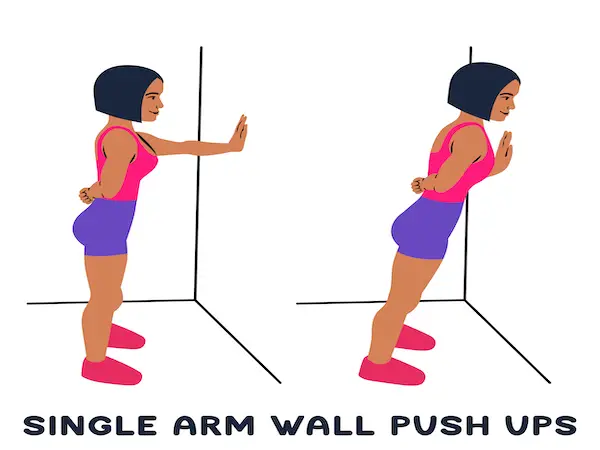
- For an added triceps workout, try doing wall push-ups with your palms turned towards each other.
- To target your lower body even more, try doing wall push-ups with one leg raised off the ground.
Mistakes to Avoid When Doing Wall Push-Ups
There are a few common mistakes people make when doing wall push-ups. Here are a few things to avoid:
- Placing your palms too low on the wall can strain your wrists and make the exercise more difficult than it needs to be.
- Bouncing off the wall reduces the effectiveness of the exercise and can lead to injury.
- Not keeping your core engaged will make the exercise harder than needed and cause back pain.
- Moving your feet too close to the wall makes the exercise easier than it should be and won’t give your lower body muscles a good workout.
- Sagging your hips takes away from the effectiveness of the exercise and can lead to back pain.
- Keeping your butt up instead of maintaining a straight line from your shoulders to your tippy toes puts unnecessary strain on your elbows and shoulders, increasing your risk of injury in these areas.
Wall Push-Up Alternatives
Wall push-ups are an excellent exercise for beginners who can’t do full push-ups yet. However, you can try other variations and machines to achieve the same push-up benefits.
Variations
Knee push-ups (harder option):
- Start in a plank position with your hands directly beneath your shoulders and your legs extended behind you.
- Bend your knees until you get a straight line from the top of your head to your hips.
- Bend your elbows until you can touch the ground with your forehead.
- From here, press through your palms to straighten your arms and return to the starting position.
Incline push-ups (easier option):
- Place your palms on an elevated surface such as a countertop, park bench, or wall.
- Bend your elbows until you can touch the surface with your forehead.
- From here, press through your palms to straighten your arms and return to the starting position.
Tabletop push-up (the easiest option):
- Get on an all-four position. Your knees should be bent directly under your hips, and your hands should be placed underneath your shoulders.
- Bend your elbows until they reach a 90-degree, and your forehead reaches the ground.
- Lift slowly and controlled to complete one rep.
- Remember to lean slightly forward while drooping down.
- Keep your back straight throughout this movement.
Machines
The chest press machine:
- Sit down on the device and select the weight you want to use.
- Position your palms on the handles in front of you and extend your arms.
- From here, return to the starting position and repeat.
The pec deck machine:
- Sit down on the machine and select the weight you want to use.
- Position your hands on the handlebars and press them together.
- From here, return to the starting position and repeat.
Why You Should Incorporate Wall Push-Ups Into Your Workout
Wall push-ups are a great exercise for beginners who can’t do full push-ups yet, but they’re also great for experienced exercisers who want to add a little challenge to their routine.
Starting small allows you to master the proper form and build more muscle.
That’s how you develop enough strength and muscle memory to execute full push-ups flawlessly.
But if you’re having issues with your form or want faster results, read this article about the best gym machines for bigger chest muscles.

It wasn't until his late twenties that he found the passion for strength training, which helped him get into great shape and stay there.
Besides sharing his favorite exercises and routines, John also provides tips on staying motivated, overcoming plateaus, and progressing in your strength training journey.
- What Happens To Your Body When You Do Dips Every Day - June 28, 2024
- 9 Push-Up Mistakes You Might Be Making (And How to Fix Them) - October 10, 2022
- The Complete Guide to Mastering Upper Chest Push Ups - October 10, 2022