
Incline push-ups are one of the most underrated exercises around. They work a ton of muscles, they can be done practically anywhere, and are not too difficult to learn.
In this blog post, we’ll discuss the benefits of incline push-ups, the muscles worked, some alternatives to incline push-ups, and how to master them.
Keep reading below for top-notch actionable advice you can implement in your routine today.
Table of Contents
How to Master Incline Push-Ups
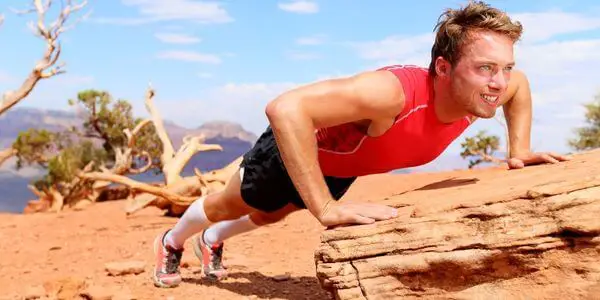
When most people think of a push-up, they picture the traditional version with hands and toes on the ground. However, this classic exercise has many variations, including the incline push-up.
This move is performed by placing your hands on an elevated surface, such as a stool or a bench. Here’s a step-by-step guide to doing an incline push-up:
- Start upright with your hands on the elevated surface and your feet on the ground.
- Bend your elbows and lower your body towards the surface until your chest is close to it.
- Pause for a moment, then push yourself back to the starting position.
- Repeat for the desired number of reps. We recommend 8-12 reps for 2-3 sets to begin with.
Mistakes to Avoid

Incline push-ups are a great way to add a little extra challenge to your workout routine. However, there are a few potential pitfalls that you should be aware of.
- Make sure that your hands are placed shoulder-width apart. If your hands are too close together, you’ll put extra strain on your chest and shoulders.
- Be careful not to let your hips sag. This will put unnecessary stress on your lower back and make it difficult to keep good form.
- Don’t arch your back when you reach the top of the push-up. This can lead to pain in the lower back and shoulders.
- Don’t creep your shoulders towards your ears. This puts unnecessary tension on the neck and shoulders and can lead to pain or injury. Keep your shoulders down and back throughout the entire exercise.
Pro Tips
Incline push-ups are a great way to mix up your workout routine, and they can be easily modified to make them harder or easier.
To increase the challenge, try to:
- Place your hands on a stability ball instead of a flat surface. The unstable surface will force your muscles to work harder to keep you balanced.
- Get your feet further from the box or chair you’re using. This position increases the angle between the elevated surface and your body, thus creating more resistance for your upper body muscles.
- Wear a weighted vest so that your arms have to work against more resistance.
- Add a clap at the top of each push-up.
If you want to make incline push-ups easier:
- Wear a resistance band a bit above your elbows. That way, you can stabilize your upper body and get lower towards the elevated surface.
- Place your hands on a bench or another high surface. This will reduce the weight you’re lifting, making the exercise easier.
- Bring your feet closer to the box or execute the exercise from your knees to decrease the force your upper body has to work against.
Benefits
Incline push-ups have several benefits, such as:
- They’re a great exercise for beginners. If you’re a beginner, there’s no point in starting with decline push-ups or pike push-ups because, at worst, you risk injuring yourself. At best, your arms will be too sore for another workout for days. The point with resistance training is to build strength gradually, and that’s what incline push-ups help you with.
- They help you master better form. Push-ups are tricky because it’s easy to sag your hips, round your back, or creep your shoulders towards your ears. But starting easy with an incline push-up helps you master that form for harder alternatives.
- They can increase your motivation. Doing just one standard push-up can demotivate you quickly. By comparison, doing twenty incline push-ups gives you the motivation boost you need to stick to your exercise routine.
- They reduce the risk of injury. Push-ups from full-plank positions are tough on your wrists, elbows, and lower back, especially if you’re new to exercise. That’s why it’s best to start small; see what your body can handle before risking a severe injury that’ll prevent you from working out for weeks.
Muscles Worked

Incline push-ups work the same muscles as standard push-ups; arguably, they’re equally effective (even if you start with the easier knee option).
Here’s what you can expect:
- Pectoral muscles: Incline push-ups target your pecs, the large, fan-shaped muscles in the center of your chest.
- Anterior deltoid muscle: This is the front part of your shoulder and helps you raise your arms in front of you.
- Triceps brachii muscle: This muscle is at the back of your upper arm and helps you extend your elbow.
- Abs: Incline push-ups also work your core muscles, which include the rectus abdominis (the “six-pack muscle”), external obliques (side abdominal muscles), and internal obliques (deep abdominal muscles).
- Lower back: Incline push-ups also work your lower back muscles, which help you maintain a stable spine.
- Glutes: Your butt muscles also get a workout with incline push-ups.
Alternatives
If incline push-ups are too easy or you’re looking for a new challenge, try some of these alternatives:
- Plyometric push-ups: These are explosive push-ups where you clap your hands in between each rep. They’re great for building power and strength.
- Diamond push-ups: These are standard push-ups with your hands placed close together in a diamond shape, which targets your triceps more.
- Spiderman push-ups: These are incline push-ups with a twist; as you lower yourself down, bring one knee to the elbow of the arm on the same side. This move also works your oblique muscles more.
If incline push-ups are too hard, try:
- Wall push-ups: These are inclined push-ups with a smaller range of motion. Place your hands on a wall at chest level and lean forward until your nose almost touches the wall.
- Knee push-ups: These push-ups have you start in a low plank position with your knees on the ground. As you get stronger, move to incline push-ups and eventually standard push-ups.
Alternatives also include specific gym machines that exercise similar muscles:
- Incline chest press: Best for your pecs, anterior deltoids, and triceps.
- Lat pull-down: Best for your lats (the muscles on the sides of your back), biceps, and forearms.
- Rowing machine: Best for your lats, middle back, biceps, and forearms. Unlike a simple puh-up, you will also build more muscles in your legs and core.
- Stationary bikes: If you want to exercise your entire body, build muscles, and lose body fat, choose a stationary spin bike with incorporated resistance bands for the arms.
- Dumbbells: Dumbbells’ biggest advantage is their versatility. You can use them for incline chest presses, lat pull-downs, rows, and many other exercises.
Pro tip: Try a kickboxing or boxing class at your local gym if you have pent-up frustration and want to give your upper body a good workout.
Wrap Up
Incline push-ups are a great way to build strength and muscle, especially in your chest and shoulders. They’re also relatively easy to do and require no equipment.
If you’re looking for a new challenge, try some of the alternatives listed above. And remember, if incline push-ups are too difficult, start with knee or wall push-ups and work your way up.
Happy incline pushing!

It wasn't until his late twenties that he found the passion for strength training, which helped him get into great shape and stay there.
Besides sharing his favorite exercises and routines, John also provides tips on staying motivated, overcoming plateaus, and progressing in your strength training journey.
- What Happens To Your Body When You Do Dips Every Day - June 28, 2024
- 9 Push-Up Mistakes You Might Be Making (And How to Fix Them) - October 10, 2022
- The Complete Guide to Mastering Upper Chest Push Ups - October 10, 2022